Showing posts with label .Net Core. Show all posts

Tuesday, June 1, 2021

Microservices in ASP.NET

Microservices is the last significant change in modern development. Let's learn some tools and related design patterns by building a simplified e-commerce website using modern tools and techniques such as ASP.NET Core and Docker.
Photo by Adi Goldstein on Unsplash

For some time we've been discussing tools and technologies adjacent to microservices on this blog. Not randomly though. Most of these posts derived from my open-source project aspnet-microservices, a simple (yet complicated 😉) distributed application built primarily with .NET Core and Docker. While still work in progress, the project demoes important concepts in distributed architectures.

What's included in the project

This project uses popular tools such as:
On the administrative side, the project also includes:

Disclaimer

When you create a sample microservice-based application, you need to deal with complexity and make tough choices. For the aspnet-microservices application, I deliberately chose to balance complexity and architecture by reducing the emphasis on design patterns focusing on the development of the services themselves. The project was built to serve as an introduction and a start-point for those looking forward to working of Docker, Compose and microservices.

This project is not production-ready! Check Areas for Improvement for more information.

Microservices included in this project

So far, the project consists of the following services:

  • Web: the frontend for our e-commerce application;
  • Catalog: provides catalog information for the web store;
  • Newsletter: accepts user emails and stores them in the newsletter database for future use;
  • Order: provides order features for the web store;
  • Account: provides account services (login, account creation, etc) for the web store;
  • Recommendation: provides simple recommendations based on previous purchases;
  • Notification: sends email notifications upon certain events in the system;
  • Payment: simulates a fake payment store;
  • Shipping: simulates a fake shipping store;

Technologies Used

The technologies used were cherry-picked from the most commonly used by the community. I chose to favour open-source alternatives over proprietary (or commercially-oriented) ones. You'll find in this bundle:
  • ASP.NET Core: as the base of our microservices;
  • Docker and Docker Compose: to build and run containers;
  • MySQL: serving as a relational database for some microservices;
  • MongoDB: serving as the catalog database for the Catalog microservice;
  • Redis: serving as distributed caching store for the Web microservice;
  • RabbitMQ: serving as the queue/communication layer over which our services will communicate;
  • MassTransit: the interface between our apps and RabbitMQ supporting asynchronous communications between them;
  • Dapper: lightweight ORM used to simplify interaction with the MySQL database;
  • SendGrid: used to send emails from our Notification service as described on a previous post;
  • Vue.js and Axios.Js to abstract the frontend of the Web microservice on a simple and powerful  JavaScript framework.

Conventions and Design Considerations

Among others, you'll find in this project that:
  • The Web microservice serves as the frontend for our e-commerce application and implements the API Gateway / BFF design patterns routing the requests from the user to other services on an internal Docker network;
  • Web caches catalog data a Redis data store; Feel free to use Redis Commander to delete cached entries if you wish or need to.
  • Each microservice has its own database isolating its state from external services. MongoDB and MySQL were chosen as the main databases due to their popularity.
  • All services were implemented as ASP.NET Core webapps exposing the endpoints /help and /ping so they can be inspected from and observed automatically the the running engine.
  • No special logging infrastructure was added. Logs can be easily accessed via docker logs or indexed by a different application if you so desire.
  • Microservices communicate between themselves via Pub/Sub and asynchronous request/response using MassTransit and RabbitMQ.
  • The Notification microservice will eventually send emails. This project was tested with SendGrid but other SMTP servers should work from within/without the containers.
  • Monitoring is experimental and includes Grafana sourcing its data from a Prometheus backend.

Technical Requirements

To run this project on your machine, please make sure you have installed:

If you want to develop/extend/modify it, then I'd suggest you to also have:

Running the microservices

So let's get quickly learn how to load and build our own microservices.

Initializing the project

Get your copy by cloning the project:
git clone https://github.com/hd9/aspnet-microservices

Next open the solution src/AspNetContainers.sln with Visual Studio 2019. Since code is always the best documentation, the easiest way to understand the containers and their configurations is by reading the src/docker-compose.yml file.

Debugging with Visual Studio

Building and debugging with Visual Studio 2019 is straightforward. Simply open the AspNetMicroservices.sln solution from the src folder, build and run the project as debug (F5). Next, run the dependencies (Redis, MongoDB, RabbitMQ and MySQL) by issuing the below command from the src folder:

docker-compose -f docker-compose.debug.yml up

Running the services with Docker Compose

In order to run the services you'll need Docker and Docker Compose installed on your machine. Type the command below from the src folder on a terminal to start all services:
docker-compose up
Then to stop them:
docker-compose down
To remove everything, run:
docker-compose down -v
To run a specific service, do:
docker-compose up <service-name>
As soon as you run your services, Compose should start emitting on the console logs for each service:
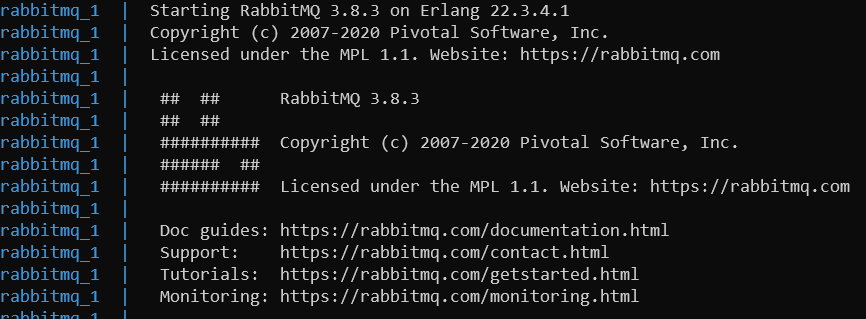
The output of our docker-compose command

You can also query individual logs for services as usual with docker logs <svc-name>. For example:

~> docker logs src_catalog_1
info: CatalogSvc.Startup[0]
      DB Settings: ConnStr: mongodb://catalog-db:27017, Db: catalog, Collection: products
info: Microsoft.Hosting.Lifetime[0]
      Now listening on: http://[::]:80
info: Microsoft.Hosting.Lifetime[0]
      Application started. Press Ctrl+C to shut down.
info: Microsoft.Hosting.Lifetime[0]
      Hosting environment: Production
info: Microsoft.Hosting.Lifetime[0]
      Content root path: /app

Database Initialization

Database initialization is automatically handled by Compose. Check the docker-compose.yml file to understand how that happens. You'll find examples on how to initialize both MySQL and MongoDB.

Dockerfiles

Each microservice contains a Dockerfile in their respective roots and understanding them should be straightforward. If you never wrote a Dockerfile before, consider reading the official documentation.

Docker Compose

There are two docker-compose files in the solution. Their use is described below:
  • docker-compose.yml: this is the main Compose file. Running this file means you won't be able to access some of the services as they'll not be exposed.
  • docker-compose.debug.yml: this is the file you should run if you want to debug the microservices from Visual Studio. This file only contains the dependencies (Redis, MySQL, RabbitMQ, Mongo + admin interfaces) you'll need to use when debugging.

Accessing our App

If the application booted up correctly, go to http://localhost:8000 to access it. You should see a simple catalog and some other widgets. Go ahead and try to create an account. Just make sure that you have the settings correctly configured on your docker-compose.yml file:
Our simple e-commerce website. As most things, its beauty is in the details 😊.

    Admin Interfaces

    You'll still have available admin interfaces for our services on:
    I won't go over the details about each of these apps. Feel free to explore on your own.

    Monitoring

    Experimental monitoring is available with Grafana, Prometheus and cadvisor. Open Grafana at http://localhost:3000/ and login with admin | admin, select the Docker dashboard and you should see metrics for the services similar to:

    Grafana capturing and emitting telemetry about our microservices.

    Quick Reference

    As a summary, the microservices are configured to run at:

    The management tools are available on:

    And you can access the databases at:
    • MySql databases: use Adminer at: http://localhost:8010/, enter the server name (ex. order-db for the order microservice) and use root | todo as username/password.
    • MongoDB: use MongoExpress at: http://localhost:8011/. No username/password is required.

    Final Thoughts

    On this post I introduce to you my open-source project aspnet-microservices. This application was built as a way to present the foundations of Docker, Compose and microservices for the whole .NET community and hopefully serves as an intuitive guide for those starting in this area.

    Microservices is the last significant change in modern development and requires learning lots (really, lots!) of new technologies and new design patterns. This project is by far complete and should not be used in production as it lacks basic cross-cutting concerns any production-ready project would need. I deliberately omitted them for simplicity else I could simply point you to this project. For more information, check the project's README on GitHub.

    Feel free to play with it and above all, learn and have fun!

    Source Code

    As always, the source code is available on GitHub at: github.com/hd9/spnet-microservices.

    Tuesday, December 1, 2020

    Distributed caching in ASP.NET Core using Redis, MongoDB and Docker

    Redis is the world's most popular caching database. Let's review how to implement distributed caching in ASP.NET Core using Redis, MongoDB and Docker Compose.
    Photo by Christian Nielsen on Unsplash

    One of the things that every modern website needs is caching. After all, we don't want to be alerted at 2AM being informed that our services are down because we had a spike in usage which our databases couldn't handle.

    One common solution to reducing the stress in our applications is placing a fast caching service between our website and our database. Modern caching implementations include requirements around decreasing response time, distributed caching (sharing the same cache between multiple web instances) and cost reduction. Most implementations today use Redis (a super-fast an in-memory key–value database) as a cache service sitting in front of a database of choice.

    On this post we will implement a fictional ASP.NET Core e-commerce website using MongoDB as database and Redis as a cache service, both running on Docker with Docker Compose so that we can understand how it all works together.

    On this post we will:
    • Scaffold an ASP.NET Core website
    • Implement a catalog service using MongoDB
    • Implement distributed caching using Redis
    • Run our dependencies using Docker Compose
    • Setup Redis Commander and Mongo Express to view/manage our services

    Setting up an ASP.NET Core website

    Let's quickly scaffold an ASP.NET Core website using the command line with:
    dotnet new mvc -n AspNetDistributedCaching
    Then, add the below configuration to your appsettings.json file:
      "Mongo": {
        "ConnectionString": "mongodb://localhost:27017",
        "Db": "catalog",
        "Collection": "products"
      },
      "Redis": {
        "Configuration": "localhost",
        "InstanceName": "web"
      }
    Next, add the config classes and bind these configs. In case you missed, feel free to review how configurations work in ASP.NET Core 3.1 projects on a previous article.

    Setting up dependencies

    Let's now setup our dependencies: Redis, MongoDB and the management interfaces  Redis Commander and Mongo Express. Despite sounding complicated, it's actually very simple if we use the right tools: Docker and Docker Compose.

    Docker Compose 101

    Without much extension, let me briefly re-introduce Docker Compose:
    Compose is a tool for defining and running multi-container Docker applications. With Compose, you use a YAML file to configure your application’s services. Then, with a single command, you create and start all the services from your configuration. See the list of features.
    Setting Compose in your project is actually very simple. For starters, paste this on a docker-compose.yml file on the root of the project. We'll add the services and their respective configurations next:
    version: '3.7'
    services:
      # we'll add our services on the next steps

    Configuring our MongoDB instance

    Next, let's configure MongoDB. Paste the snippet below at the bottom of your docker-compose.yml file. It will instruct Compose to init a Mongo instance called catalog-db and initialize the catalog database from the ./db.js file:
      catalog-db:
        image: mongo
        environment:
          # MONGO_INITDB_ROOT_USERNAME: root
          # MONGO_INITDB_ROOT_PASSWORD: todo
          MONGO_INITDB_DATABASE: catalog
        volumes:
        - .db.js:/docker-entrypoint-initdb.d/db.js:ro
        expose:
          - "27017"     ports:
          - "3301:27017"

    Configuring our Redis instance

    As with MongoDB, let's now setup our Redis cache. Paste this at the bottom of your docker-compose.yml file:
      redis:
        image: redis:6-alpine
        expose:
          - "6379"
        ports:
          - "6379:6379"

    Configuring  the Management interfaces

    Let's now setup management interfaces for Redis - Redis Commander and Mongo - Mongo Express to access our resources (I'll show later how do you use them). Again, paste the below on your docker-compose.yml file:
      # Mongo Express: tool to manage our Mongo database
      mongo-express:
        image: mongo-express
        restart: always
        ports:
          - "8011:8081"
        environment:
          - ME_CONFIG_MONGODB_SERVER=catalog-db
          # MONGO_INITDB_ROOT_USERNAME: root
          # MONGO_INITDB_ROOT_PASSWORD: todo
        depends_on:
          - catalog-db

      # Redis Commander: tool to manage our Redis container from localhost
      redis-commander:
        image: rediscommander/redis-commander:latest
        environment:
          - REDIS_HOSTS=redis
        ports:
          - "8013:8081"
        depends_on:
          - redis

    Querying Catalog Data

    Obviously in order to cache the data, we should have it first. So let's implement a simple MongoDB wrapper using the Repository Pattern which I'll call CatalogRepository. Its interface looks like:
    public interface ICatalogRepository
    {
        Task<IList<Category>> GetCategories();
        Task<Category> GetCategory(string slug);
        Task<Product> GetProduct(string slug);
        Task<IList<Product>> GetProductsByCategory(string slug);
    }
    For the concrete implemtation, don't forget to add the MongoDB.Driver NuGet Package. I show a simple query below. To view it in full, check this demo's repo:
    public async Task<IList<Category>> GetCategories()
    {
        var c = _db.GetCollection<Category>("categories");
        return (await c.FindAsync(new BsonDocument())).ToList();
    }
    Next, let's set up DI for this guy using ASP.NET's DI framework:
    services.AddTransient<ICatalogRepository, CatalogRepository>();
    To view the code in full, check it on this demo's repo at github.com/hd9/aspnet-distributed-caching.

    Caching Catalog Data

    With the repository working, let's implement the caching. I'll divide this task in:
    1. setting up Redis with distributed caching
    2. implementing a Service class and
    3. adding the caching logic to the service class.

    Setting up the Redis Initialization

    First, add NuGet references to Microsoft.Extensions.DependencyInjection. and Microsoft.Extensions.Caching.StackExchangeRedis. Then add the add a call to services.AddStackExchangeRedisCache in ConfigureServices:
    services.AddStackExchangeRedisCache(o =>
    {
        o.Configuration = cfg.Redis.Configuration;
        o.InstanceName = cfg.Redis.InstanceName;
    });

    Implementing a Service Class

    The next part consists of implementing the caching logic. Such logic will live in CatalogService which implements the service design pattern and abstracts from the Controller either the repository and the caching implementations. Its first important part is the constructor which looks like this:
    public CatalogSvc(
        ICatalogRepository repo,
        IDistributedCache cache)
    {
        _repo = repo;
        _cache = cache;
    }

    Adding the caching logic

    Then, every method of the above interface are similarly implemented. For example, the GetCategories method that feeds the landing page looks like this:
    public async Task<IList<Category>> GetCategories()
    {
        return await GetFromCache<IList<Category>>(
            "categories",
            "*",
            async () => await _repo.GetCategories());
    }
    And our GetFromCache private method that generalizes caching logic for our catalog service looks like:
    private async Task<TResult> GetFromCache<TResult>(
        string key,
        string val,
        Func<Task<object>> func)
    {
        var cacheKey = string.Format(_keyFmt, key, val);
        var data = await _cache.GetStringAsync(cacheKey);

        if (string.IsNullOrEmpty(data))
        {
            data = JsonConvert.SerializeObject(await func());

            await _cache.SetStringAsync(
                cacheKey,
                data);
        }

        return JsonConvert.
            DeserializeObject<TResult>(data);
    }
    The interesting bits of the above piece of code is that before searching the database (which's abstracted by a Func<> parameter), it searches the cache with GetStringAsync. If it finds, it returns the cached data cast as the provided type (TResult) by deserializing it from its string value. In case the cache key is not present, it will invoke the target function and cache its result as a Json string in the Redis cache.

    To use it, first we wire it up to the DI container:
    services.AddTransient<ICatalogSvc, CatalogSvc>();
    So we can properly inject it and use it in our controllers:
    public HomeController(ICatalogSvc svc)
    {
        _svc = svc;
    }

    Management Interfaces

    To finish up, let's quickly review how to access the management interfaces for Redis and Mongo Express.

    Accessing Mongo Express

    To view/modify your catalog, you can access Mongo Express at: http://localhost:8011/. I changed from the original port 8081 to 8011 since many services run on that port and if it was your case, Compose would fail. But feel free to change that configuration on your docker-compose.yml file. As previously mentioned, this database is auto-initialized from the db.js file by Docker Compose. Here's a quick glance of Mongo Express displaying our catalog data:

    Accessing Redis Commander

    Redis Commander is a frontend for vieweing and managing Redis. On this demo I run it on http://localhost:8011/. As previously, feel free to change the port on your docker-compose.yml file. Here's Redis Commander showing our cached data:

    Running the Services

    The last part is to describe how to run the services. As a .NET developer, you're already used to debug and run your solutions with Visual Studio - the same applies here. The only thing that remains is how to run the dependencies? As mentioned, it's as simple as running the below command from the project's root with Docker Compose:
    docker-compose up
    You should see the services starting in the backend similar to this:
    To shutdown, run:
    docker-compose down
    Finally, to remove everything, run:
    docker-compose down -v

    Final Thoughts

    On this article we reviewed how to use Redis, a super-fast key-value document database in front of MongoDB database serving as a distributed service. On this example we still leveraged Docker and Docker Compose to simplify the setup and the initialization of our project so we could get our application running and test it as quickly as possible.

    Redis is one of the world's most used and loved databases and a very common option for caching. I hope you also realized how Docker and Docker Compose help developers by simplifying rebuilding complex environments like this.

    Source Code

    As always, the source code for this article is available on my GitHub.

    References

    Monday, November 2, 2020

    Async Request/Response with MassTransit, RabbitMQ, Docker and .NET core

    Let's review how to implement an async resquest/response exchange between two ASP.NET Core websites via RabbitMQ queues using MassTransit
    Photo by Pavan Trikutam on Unsplash

    Undoubtedly the most popular design pattern when writing distributed application is Pub/Sub. Turns out that there's another important design pattern used in distributed applications not as frequently mentioned, that can also be implemented with queues: async requests/responses. Async requests/responses are very useful and widely used to exchange data between microservices in non-blocking calls, allowing the requested service to throttle incoming requests via a queue preventing its own exhaustion.

    On this tutorial, we'll implement an async request/response exchange between two ASP.NET Core websites via RabbitMQ queues using MassTransit. We'll also wire everything up using Docker and Docker Compose.

    On this post we will:
    • Scaffold two ASP.NET Core websites
    • Configure each website to use MassTransit to communicate via a local RabbitMQ queue
    • Explain how to write the async request/response logic
    • Run a RabbitMQ container using Docker
    • Test and validate the results

    Understanding MassTransit Async Requests

    If you understand how to wire everything up, setting up async request/response with MassTransit is actually very simple. So before getting our hands into the code, let's review the terminology you'll need to know:
    • Consumer: a class in your service that'll respond for requests (over a queue on this case);
    • IRequestClient<T>: the interface we'll have to implement to implement the client and invoke async requests via the queue;
    • ReceiveEndpoint: a configuration that we'll have to setup to enable our Consumer to listen and respond to requests;
    • AddRequestClient: a configuration that we'll have to setup to allow our own async request implementation;
    Keep that info in mind as we'll use them in the following sections.

    Creating our Project

    Let's quickly scaffold two ASP.NET Core projects by using the dotnet CLI with:
    dotnet new mvc -o RequestSvc
    dotnet new mvc -o ResponseSvc

    Adding the Dependencies

    The dependencies we'll need today are:

    Adding Configuration

    The configuration we'll need  is also straightforward. Paste this in your RequestSvc/appsettings.json:
    "MassTransit": {
        "Host": "rabbitmq://localhost",
        "Queue": "requestsvc"
    }
    And this in your ResponseSvc/appsettings.json:
    "MassTransit": {
        "Host": "rabbitmq://localhost",
        "Queue": "responsesvc"
    }
    Next, bind the config classes to those settings. Since I covered in detail how configurations work in ASP.NET Core 3.1 projects on a previous article I'll skip that to keep this post short. But if you need, feel free to take a break and understand that part first before you proceed.

    Adding Startup Code

    Wiring up MassTransit in ASP.NET DI framework is also well documented. For our solution it would look like this for the RequestSvc project:
    services.AddMassTransit(x =>
    {
        x.AddBus(context => Bus.Factory.CreateUsingRabbitMq(c =>
        {
            c.Host(cfg.MassTransit.Host);
            c.ConfigureEndpoints(context);
        }));
       
        x.AddRequestClient<ProductInfoRequest>();
    });

    services.AddMassTransitHostedService();
    And like this for the  ResponseSvc project:
    services.AddMassTransit(x =>
    {
        x.AddConsumer<ProductInfoRequestConsumer>();

        x.AddBus(context => Bus.Factory.CreateUsingRabbitMq(c =>
        {
            c.Host(cfg.MassTransit.Host);
            c.ReceiveEndpoint(cfg.MassTransit.Queue, e =>
            {
                e.PrefetchCount = 16;
                e.UseMessageRetry(r => r.Interval(2, 3000));
                e.ConfigureConsumer<ProductInfoRequestConsumer>(context);
            });
        }));
    });

    services.AddMassTransitHostedService();
    Stop for a second and compare the differences between both initializations. Spot the differences?

    Building our Consumer

    Before we can issue our requests, we have to build a consumer to handle these messages. In MassTransit's world, this is the same consumer you'd build for your regular pub/sub. For this demo, our ProductInfoRequestConsumer looks like this:
    public async Task Consume(ConsumeContext<ProductInfoRequest> context)
    {
        var msg = context.Message;
        var slug = msg.Slug;

        // a fake delay
        var delay = 1000 * (msg.Delay > 0 ? msg.Delay : 1);
        await Task.Delay(delay);

        // get the product from ProductService
        var p = _svc.GetProductBySlug(slug);

        // this responds via the queue to our client
        await context.RespondAsync(new ProductInfoResponse
        {
            Product = p
        });
    }

    Async requests

    With consumer, configuration and the startup logic in place, it's time to write the request code. In essence, this is the piece of code that will mediate the async communication between the caller and the responder using a queue (abstracted obviously by MassTransit). A simple async request to a remote service using a backend queue looks like:
    using (var request = _client.Create(new ProductInfoRequest { Slug = slug, Delay = timeout }))
    {
        var response = await request.GetResponse<ProductInfoResponse>();
        p = response.Message.Product;
    }

    Running the dependencies

    To run RabbitMQ, we'll use Docker Compose. Running RabbitMQ with Compose is as simple as running the below command from the src folder:
    docker-compose up
    If everything correctly initialized, you should expect to see RabbitMQ's logs emitted by Docker Compose on the terminal:
    To shutdown Compose and RabbitMQ, either click Ctrl-C or run:
    docker-compose down
    Finally, to remove everything, run:
    docker-compose down -v

    Testing the Application

    Open the project from Visual Studio 2019, and run it as debug (F5) and VS will open 2 windows - one for RequestSvc and another for ResponseSvc. RequestSvc looks like this:

    Go ahead and run some queries. If you got your debugger running, it will stop in both services allowing you to validate the exchange between them. To reduce Razor boilerplate the project uses VueJS and AxiosJs so we get responses in the UI without unnecessary roundtrips.

    RabbitMQ's Management Interface

    The last thing worth mentioning is how to get to RabbitMQ's management interface. This project also allows you to play with RabbitMQ at http://localhost:8012. By logging in with guest | guest and clicking on the Queues tab you should see something similar to:
    RabbitMQ is a powerful message-broker service. However, if you're running your applications on the cloud, I'd suggest using a fully-managed service such as Azure Service Bus since it increases the resilience of your services.

    Final Thoughts

    On this article we reviewed how to implement an asynchronous request/response using queues. Async resquests/responses are very useful and widely used to exchange data between microservices in non-blocking calls, allowing the resqueted service to throttle incoming requests via a queue preventing its own exhaustion. On this example we still leveraged Docker and Docker Compose to simplify the setup and the initialization of our backend services.

    I hope you liked the demo and will consider using this pattern in your applications.

    Source Code

    As always, the source code for this article is available on my GitHub.

    References

    See Also

    Thursday, October 1, 2020

    Building and Hosting Docker images on GitHub with GitHub Actions

    Building Docker images for our ASP.NET Core websites is easy and fun. Let's see how.
    Photo by Steve Johnson on Unsplash

    On a previous post we discussed how to build our own Docker images from ASP.NET Core websites, push and host them on GitHub Packages. We also saw how to build and host our own NuGet packages in GitHub. Those approaches are certainly the recommended if you already have a CI/CD implemented for your project. However, for new projects running on GitHub, GitHub Actions deserves your attention.

    What we will build

    On this post we'll review how to build Docker images from a simple ASP.NET Core website and setup continuous integrations using GitHub Actions to automatically build, test and deploy them as GitHub Packages.

    Requirements

    To run this project on your machine, please make sure you have installed:

    If you want to develop/extend/modify it, then I'd suggest you to also have:

    About GitHub Packages

    GitHub Packages is GitHub's offering for those wanting to host their own packages or Docker images. The benefits of using GitHub Packages is that it's free, you can share your images privately or publicly and you can integrate with other GitHub tooling such as APIs, Actions, webhooks and even create complex end-to-end DevOps workflows.

    About GitHub Actions

    GitHub Actions allows automating all your workflows such as build, test, and deployments right from GitHub. We can also use Actions to make code reviews, branch management, and issue triaging. GitHub Actions is very powerful, easy to customize, extend and it counts with lots of pre-configured templates to build and deploy pretty much everything.

    Building our Docker Image

    So let's quickly build our Docker image. For this demo, I'll use my own aspnet-github-actions. If you want to follow along, open a terminal and clone the project with:
    git clone https://github.com/hd9/aspnet-github-actions

    Building our local image

    Next, cd into that folder and build a local Docker image with:
    docker build . -t aspnet-gitub-actions
    Now confirm your image was successfully built with:
    docker images

    Testing our image

    With the image built, let's quickly test it by running:
    docker run --rm -d -p 8080:80 --name webapp aspnet-gitthub-actions
    Browse to http://localhost:8080 to confirm it's running:

    Stop the container with the command below as we'll take a look at the setup on GitHub:
    docker stop webapp
    For more information on how to setup and run the application, check the project's README file.

    Setting up Actions

    With the container building and running locally, it's time to setup GitHub Actions. Open your repo and click on Actions:
    From here, you can either add a blank workflow or use a build template for your project. For our simple project I can use the template Publish Docker Container:
    By clicking Set up this workflow, GitHub will add a clone of that file to our repo at ~/.github/workflows/ and will load an editor so we can edit our recently created file. Go ahead and modify it to your needs. Since our Dockerfile is pretty standard, you'll only need to change the IMAGE_NAME to something adequate to your image:

    Running the Workflow

    As soon as you add that file, GitHub will run your first action. If you haven't pushed your code yet it'll probably fail:
    To fix the error above, go ahead and push some code (or reuse mine if you wish). Assuming you have a working Dockerfile in the root of your project (where the script expects it to be), you should see your next project being queued and run. The UI is pretty cool and allows you to inspect the process in real time:
    If the workflow finishes successfully, we'll get a confirmation like:
    Failed again? Did you update IMAGE_NAME as explained on the previous step?

    Accessing the Packages

    To view your Docker images, go to the project's page and click on Packages link:
    By clicking on your package, you'll see other details about your package, including how to pull it and run it locally:

    Running our Packages

    From there, the only thing remaining would be running our recently created packages. Since we already discussed in detail how to host and use our Docker images from GitHub packages, fell free to jump that post to learn how.

    Final Thoughts

    On this post we reviewed how to automatically build Docker images using GitHub Actions. GitHub Actions makes it easy to automate all your workflows including CI/CD, builds, test, and deployments. Hosting our Docker images on GitHub is valuable as you can share your images privately or with the rest of the world, integrate with GitHub tools and even create complex DevOps workflows. Other common scenarios would be building our images on GitHub and pushing them to Docker Hub or even auto-deploying them to the cloud. We'll evaluate those in the future so keep tuned!

    Source Code

    As always, the source code is available on GitHub.

    See Also

    Tuesday, September 1, 2020

    Hosting Docker images on GitHub

    Hosting our own Docker images on GitHub is simpler than you think. On this post, let's review how.
    Photo by Annie Spratt on Unsplash

    We recently reviewed how to host our NuGet packages on GitHub. Turns out that another popular feature of GitHub Packages is hosting Docker images. Given that GitHub is the world's largest development website and you're probably already hosting your code up there, why not also review how to build, host and consume our own ASP.NET Core Docker images on it?

    On this post we will:

    Requirements

    To run this project on your machine, please make sure you have installed:

    If you want to develop/extend/modify it, then I'd suggest you to also have:

    About GitHub Packages

    GitHub Packages is GitHub's free offering for those wanting to host their own packages or Docker images in GitHub itself. The benefits of using GitHub Packages is that it's free, you can share your images privately or with the rest of the world, integrate with the GitHub API, GitHub Actions, webhooks and even create complex end-to-end DevOps workflows.

    Building our Docker Image

    So let's quickly build our Docker image. For this demo, I'll use my own aspnet-docker project. If you want to follow along, open a terminal and clone the project with:
    git clone https://github.com/hd9/aspnet-docker

    Building our local image

    Next, cd into that folder and build a local Docker image with:
    docker build . -t webapp:0.0.1
    Now confirm your image was successfully built with:
    docker images
    You should see something along the lines of:
    webapp      0.0.1               73a91c1204db        21 seconds ago      212MB
    For more information on how to setup and run the application, check the project's README file.

    Testing our local image

    Before pushing our image to GitHub, let's make sure it runs fine with:
    docker run --rm -d -p 8080:80 webapp:0.0.1
    Test it at http://localhost:8080/. Here's what you should see:

    Pushing packages to GitHub

    With the image ready and working, let's review how to push your own Docker images to GitHub.

    Generating an API Key

    In order to authenticate to GitHub Packages the first thing we'll need is an access token. Open your GitHub account, go to Settings -> Developer Settings -> Personal access tokens, click Generate new Token, give it a name, select write:packages and save: 
    Now copy the API key provided, we'll use it in the next step.

    Logging in with Docker

    To push our images to GitHub, first we log in with:
    docker login https://docker.pkg.github.com -u <github-username> -p <api-key>
    Or, you could echo your api key from a file with:
    cat api-key.txt | docker login https://docker.pkg.github.com -u <github-username> --password-stdin
    Or even better, using an env var with:
    echo $<envvar-name> | docker login https://docker.pkg.github.com -u <github-username> --password-stdin

    Tagging our image

    With the login successful, we now need to tag the image and push. Let's tag it first with:
    docker tag <img-name> docker.pkg.github.com/<gh-user>/<repo>/<img-name>:<version>
    Confirm you get both images with docker image ls:
    docker image ls
    Here's what you should see:
    REPOSITORY                                       TAG       IMAGE ID       CREATED             SIZE
    webapp                                           0.0.1     73a91c1204db   30 minutes ago      212MB
    docker.pkg.github.com/hd9/aspnet-docker/webapp   0.0.1     73a91c1204db   30 minutes ago      212MB

    Pushing the image to GitHub

    Finally, push it to the remote repo with:
    docker push docker.pkg.github.com/<gh-user>/<repo>/<img-name>:<version>
    Here's what I got during my tests:

    Reviewing our image on GitHub

    Let's confirm our image was successfully pushed to GitHub. Open your project's page and click on Packages. Our webapp package looks like this:

    Using our image

    To consume our image we'll have to (1) login with docker, (2) pull the image and (3) run it. As previously mentioned, I'll run it from a different box. This time on an Alpine Linux VM I love playing with.
    To learn how to install and run Docker on Alpine, check this link.
    Let's once more login on GitHub with Docker with:
    docker login https://docker.pkg.github.com -u <github-username> -p <api-key>

    Pulling the image the image

    After the login, pulling our image is as simple as:
    docker pull docker.pkg.github.com/<gh-user>/<repo>/<img-name>:<version>
    For context, here's my pull in action:
    After the pull confirm with docker image ls:

    Run the image

    And finally run our image with:
    docker run --rm -d -p 8080:80 webapp:0.0.1
    If you want, confirm your image is running with:
    docker ps

    Accessing the container

    Lastly, let's confirm we can access it from our host. On Alpine, enter ip a show eth0 to show the VM's internal IP:
    And finally, access it from the host (your machine) with your browser. On my case, http://172.27.197.46:8080/:

    Final Thoughts

    On this post we reviewed how to build our own Docker images, pushed them to GitHub and finally demoed how to consume them on a different machine. Creating and hosting our own Docker images on GitHub is valuable as you can share your images privately, with the rest of the world, integrate with GitHub APIs, GitHub Actions, webhooks, creating complex end-to-end DevOps workflows and even deploy them to a Kubernetes cluster. We'll evaluate that in the future so keep tuned!

    Source Code

    As always, the source code is available on GitHub.

    See Also

    About the Author

    Bruno Hildenbrand      
    Principal Architect, HildenCo Solutions.