Azure offers many tools to manage our Linux VMs. On this post, let's review the most interesting ones.
 |
| Photo by Szabo Viktor on Unsplash |
On previous posts we learned how to create a CentOS VM on Hyper-V and how to deploy and run it on Azure. Today we will review some of the tools available on Azure to manage our virtual machines. Azure offers many tools to manage our Linux VMs including alerts, automatic backups, security, making managing our VMs an easy task.
On this post I'll be using my a CentOS VM but these tips should apply to any distro of your choice. If you want to know what's necessary to run a custom CentOS VM on Azure, please check the previous posts where where I
detailed how to create a CentOS VM locally and how to get it running on to Azure.
Getting ready
So let's get started. Let's access our VM in Azure by clicking on Virtual Machines and selecting it:

Tip 1 - Deallocating to cut costs
In Azure, stopping and deallocating my VMs are different. If all you want is cutting costs then you should be deallocating your VMs. Just mind that by deallocating the VM, some of your resources will be released including your public IP. Want to keep it? You can as show below, but you will be charged for it.
Tip 2 - Accessing logs with Serial Log
Accessing the logs for your VMs is also simple by going to Boot Diagnostics -> Serial Log. For example, this is the what I got from my boot:
Tip 3 - VM Screenshot
Can't access your VM? The screenshot tool may be useful as it can show you the stat of your virtual machine. To access the screenshot tool, go to Boot Diagnostics -> Secreenshot: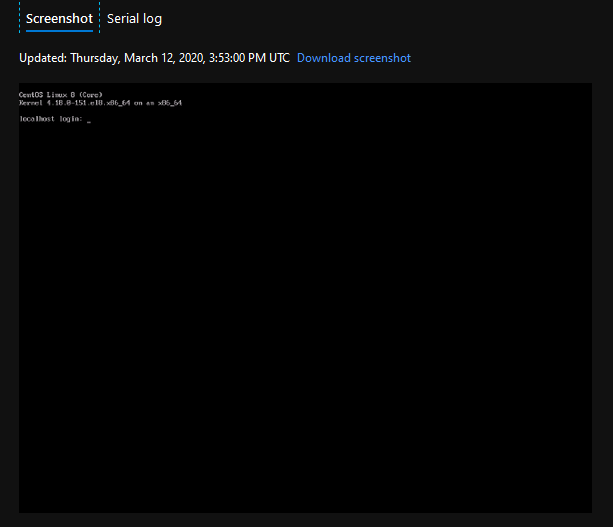
Tip 4 - SSHing into the VM
Most of us know already how to SSH into our VMs: we get our public IP address from the overview page and SSH into directly to the terminal. However, Azure also provides us a nice Connect tab where it shows different ways we could to connect to our servers:
ssh user@ip
Tip 5 - Connection Troubleshoot
In case the above doesn't work, we also have access to a Connection Troubleshoot pane where we can test the connection to the VM. This screen is useful as it runs from inside Azure bypassing the external firewall rules isolating potential routing or network problems between our machine and our server:
Tip 6 - Configure the Virtual Network
The Networking tab allows us configuring the virtual network. From here we can allow/restrict access by source, protocol, port, inbound, outbound and load balancing tools. The basic configuration is:
Tip 7 - Allow your own IPs using NSG Firewall Rules
We can leverage custom firewall rules to block malicious IPs directly in Azure directly in the Network Security Group (NSG) associated to your VM. The recommendation is to block everything and only whitelist (allow access) to the IPs you trust. Whitelisting is better than blacklisting because people use cloud servers and rotate their IPs pretty frequently. To do that, choose Source = IP Addresses and specify your own IPs:
Tip 8 - Block specific ports using NSG Firewall Rules
You could also restrict access to whatever you need. For example, to deny requests on port 22 we could add the following rule:
It's recommended to not leave your machine exposed. During my tests my server logged more than 1000 attempts to brute force a password from more than 40 different IPs. Make sure to keep your box secured!
In case you need, here's how to monitor who's trying to break into your box since the last boot:
journalctl -b | grep "Failed password for" | sed 's/.* from //'
failed.txt | sed 's/ port.*$//' | sort -u | wc -l
1136
1136
Tip 9 - Accessing the Serial Console
Azure Serial Console is one of my favourites. It allows us to run commands on the VM from Azure. It's an essential tool to debug, fix and inspect our VM. From it you can login to your machine (even if you cannot from your own PC) and manage it remotely via Azure:
Tip 10 - Configure the Public IP
You can also configure how Azure assigns your VM a public IP. Dynamic means it will rotate (change) after each deallocation. Static (more expensive) will reserve that IP for you but will incur costs even if the VM is deallocated:
Tip 11 - Create a custom DNS Name
We could also create a custom DNS name for our VM so that we can access it using the DNS name instead of its IP address. That can be one on Overview -> DNS Name -> Configure and if your domain is managed by Azure (like mine), you should also be able to configure a subdomain to point to that VM directly from here. For example, to create a subdomain like ssh.mydomain.com pointing to your CentOS server you should do:
Tip 12 - Reset Password
Forgot your password? You can reset it directly from Azure. Plus,configuration and SSH public key can also be reset:
Tip 13 - Configure Backup Policies
Auto-backing up of our VM is another nice feature. We can specify the location, interval and time and have Azure do the job:
Tip 14 - View VM Telemetry
Azure also provides interesting telemetry about our VMs. And you can even configure your own if you wish:
Tip 15 - Create Custom Alerts
Azure utilizes insights captured for your VM to generate alerts based on your custom criteria and allows us to create custom alerts that can notify us by Email/text. Simply go to Create Rule:

Tip 16 - Specify Auto-shutdown
Auto-shutdown is also very useful. It allows us to schedule shutdowns helping saving on costs:
Tip 17 - Specify a Disaster Recovery Strategy
We can also leverage Azure's Site Recovery functionality to replicate our VMs. That's very useful for keeping the SLAs and recovering from disaster recovery situations:
Tip 18 - Automated Security Recommendations
If you're willing to pay a little more Azure also offers security recommendations via its Security Center where you can increase your protection:
Tip 19 - Export Template Scripts
This is also nice as we can export a reproducible script to automate the creation of an equivalent VM. Save this on your company's repository so you can quickly span new clones of this VM in the future.
Tip 20 - Run adhoc commands
This is also a very useful feature where you can, from the portal, run a command on your machine:
Conclusion
On this post we presented various tools to manage your Linux VM on Azure. While we can always manage our VMs using SSH, it's also important to remember that when running on the cloud, there are other awesome tools we can leverage to monitor, inspect, alert, manage, secure and troubleshoot your server.And remember that it's very, very important to secure your VMs in the cloud.
See Also
- My journey to 1 million articles read
- How to create a Ubuntu Desktop on Azure
- How to create a CentOS VM on Azure
- How to create a CentOS Stream VM on Hyper-V
- Send emails from ASP.NET Core websites using SendGrid and Azure
- Why I use Fedora Linux
- How I fell in love with i3
- Windows Subsystem for Linux, the best way to learn Linux on Windows