Showing posts with label GitHub. Show all posts

Thursday, October 1, 2020

Building and Hosting Docker images on GitHub with GitHub Actions

Building Docker images for our ASP.NET Core websites is easy and fun. Let's see how.
Photo by Steve Johnson on Unsplash

On a previous post we discussed how to build our own Docker images from ASP.NET Core websites, push and host them on GitHub Packages. We also saw how to build and host our own NuGet packages in GitHub. Those approaches are certainly the recommended if you already have a CI/CD implemented for your project. However, for new projects running on GitHub, GitHub Actions deserves your attention.

What we will build

On this post we'll review how to build Docker images from a simple ASP.NET Core website and setup continuous integrations using GitHub Actions to automatically build, test and deploy them as GitHub Packages.

Requirements

To run this project on your machine, please make sure you have installed:

If you want to develop/extend/modify it, then I'd suggest you to also have:

About GitHub Packages

GitHub Packages is GitHub's offering for those wanting to host their own packages or Docker images. The benefits of using GitHub Packages is that it's free, you can share your images privately or publicly and you can integrate with other GitHub tooling such as APIs, Actions, webhooks and even create complex end-to-end DevOps workflows.

About GitHub Actions

GitHub Actions allows automating all your workflows such as build, test, and deployments right from GitHub. We can also use Actions to make code reviews, branch management, and issue triaging. GitHub Actions is very powerful, easy to customize, extend and it counts with lots of pre-configured templates to build and deploy pretty much everything.

Building our Docker Image

So let's quickly build our Docker image. For this demo, I'll use my own aspnet-github-actions. If you want to follow along, open a terminal and clone the project with:
git clone https://github.com/hd9/aspnet-github-actions

Building our local image

Next, cd into that folder and build a local Docker image with:
docker build . -t aspnet-gitub-actions
Now confirm your image was successfully built with:
docker images

Testing our image

With the image built, let's quickly test it by running:
docker run --rm -d -p 8080:80 --name webapp aspnet-gitthub-actions
Browse to http://localhost:8080 to confirm it's running:

Stop the container with the command below as we'll take a look at the setup on GitHub:
docker stop webapp
For more information on how to setup and run the application, check the project's README file.

Setting up Actions

With the container building and running locally, it's time to setup GitHub Actions. Open your repo and click on Actions:
From here, you can either add a blank workflow or use a build template for your project. For our simple project I can use the template Publish Docker Container:
By clicking Set up this workflow, GitHub will add a clone of that file to our repo at ~/.github/workflows/ and will load an editor so we can edit our recently created file. Go ahead and modify it to your needs. Since our Dockerfile is pretty standard, you'll only need to change the IMAGE_NAME to something adequate to your image:

Running the Workflow

As soon as you add that file, GitHub will run your first action. If you haven't pushed your code yet it'll probably fail:
To fix the error above, go ahead and push some code (or reuse mine if you wish). Assuming you have a working Dockerfile in the root of your project (where the script expects it to be), you should see your next project being queued and run. The UI is pretty cool and allows you to inspect the process in real time:
If the workflow finishes successfully, we'll get a confirmation like:
Failed again? Did you update IMAGE_NAME as explained on the previous step?

Accessing the Packages

To view your Docker images, go to the project's page and click on Packages link:
By clicking on your package, you'll see other details about your package, including how to pull it and run it locally:

Running our Packages

From there, the only thing remaining would be running our recently created packages. Since we already discussed in detail how to host and use our Docker images from GitHub packages, fell free to jump that post to learn how.

Final Thoughts

On this post we reviewed how to automatically build Docker images using GitHub Actions. GitHub Actions makes it easy to automate all your workflows including CI/CD, builds, test, and deployments. Hosting our Docker images on GitHub is valuable as you can share your images privately or with the rest of the world, integrate with GitHub tools and even create complex DevOps workflows. Other common scenarios would be building our images on GitHub and pushing them to Docker Hub or even auto-deploying them to the cloud. We'll evaluate those in the future so keep tuned!

Source Code

As always, the source code is available on GitHub.

See Also

Tuesday, September 1, 2020

Hosting Docker images on GitHub

Hosting our own Docker images on GitHub is simpler than you think. On this post, let's review how.
Photo by Annie Spratt on Unsplash

We recently reviewed how to host our NuGet packages on GitHub. Turns out that another popular feature of GitHub Packages is hosting Docker images. Given that GitHub is the world's largest development website and you're probably already hosting your code up there, why not also review how to build, host and consume our own ASP.NET Core Docker images on it?

On this post we will:

Requirements

To run this project on your machine, please make sure you have installed:

If you want to develop/extend/modify it, then I'd suggest you to also have:

About GitHub Packages

GitHub Packages is GitHub's free offering for those wanting to host their own packages or Docker images in GitHub itself. The benefits of using GitHub Packages is that it's free, you can share your images privately or with the rest of the world, integrate with the GitHub API, GitHub Actions, webhooks and even create complex end-to-end DevOps workflows.

Building our Docker Image

So let's quickly build our Docker image. For this demo, I'll use my own aspnet-docker project. If you want to follow along, open a terminal and clone the project with:
git clone https://github.com/hd9/aspnet-docker

Building our local image

Next, cd into that folder and build a local Docker image with:
docker build . -t webapp:0.0.1
Now confirm your image was successfully built with:
docker images
You should see something along the lines of:
webapp      0.0.1               73a91c1204db        21 seconds ago      212MB
For more information on how to setup and run the application, check the project's README file.

Testing our local image

Before pushing our image to GitHub, let's make sure it runs fine with:
docker run --rm -d -p 8080:80 webapp:0.0.1
Test it at http://localhost:8080/. Here's what you should see:

Pushing packages to GitHub

With the image ready and working, let's review how to push your own Docker images to GitHub.

Generating an API Key

In order to authenticate to GitHub Packages the first thing we'll need is an access token. Open your GitHub account, go to Settings -> Developer Settings -> Personal access tokens, click Generate new Token, give it a name, select write:packages and save: 
Now copy the API key provided, we'll use it in the next step.

Logging in with Docker

To push our images to GitHub, first we log in with:
docker login https://docker.pkg.github.com -u <github-username> -p <api-key>
Or, you could echo your api key from a file with:
cat api-key.txt | docker login https://docker.pkg.github.com -u <github-username> --password-stdin
Or even better, using an env var with:
echo $<envvar-name> | docker login https://docker.pkg.github.com -u <github-username> --password-stdin

Tagging our image

With the login successful, we now need to tag the image and push. Let's tag it first with:
docker tag <img-name> docker.pkg.github.com/<gh-user>/<repo>/<img-name>:<version>
Confirm you get both images with docker image ls:
docker image ls
Here's what you should see:
REPOSITORY                                       TAG       IMAGE ID       CREATED             SIZE
webapp                                           0.0.1     73a91c1204db   30 minutes ago      212MB
docker.pkg.github.com/hd9/aspnet-docker/webapp   0.0.1     73a91c1204db   30 minutes ago      212MB

Pushing the image to GitHub

Finally, push it to the remote repo with:
docker push docker.pkg.github.com/<gh-user>/<repo>/<img-name>:<version>
Here's what I got during my tests:

Reviewing our image on GitHub

Let's confirm our image was successfully pushed to GitHub. Open your project's page and click on Packages. Our webapp package looks like this:

Using our image

To consume our image we'll have to (1) login with docker, (2) pull the image and (3) run it. As previously mentioned, I'll run it from a different box. This time on an Alpine Linux VM I love playing with.
To learn how to install and run Docker on Alpine, check this link.
Let's once more login on GitHub with Docker with:
docker login https://docker.pkg.github.com -u <github-username> -p <api-key>

Pulling the image the image

After the login, pulling our image is as simple as:
docker pull docker.pkg.github.com/<gh-user>/<repo>/<img-name>:<version>
For context, here's my pull in action:
After the pull confirm with docker image ls:

Run the image

And finally run our image with:
docker run --rm -d -p 8080:80 webapp:0.0.1
If you want, confirm your image is running with:
docker ps

Accessing the container

Lastly, let's confirm we can access it from our host. On Alpine, enter ip a show eth0 to show the VM's internal IP:
And finally, access it from the host (your machine) with your browser. On my case, http://172.27.197.46:8080/:

Final Thoughts

On this post we reviewed how to build our own Docker images, pushed them to GitHub and finally demoed how to consume them on a different machine. Creating and hosting our own Docker images on GitHub is valuable as you can share your images privately, with the rest of the world, integrate with GitHub APIs, GitHub Actions, webhooks, creating complex end-to-end DevOps workflows and even deploy them to a Kubernetes cluster. We'll evaluate that in the future so keep tuned!

Source Code

As always, the source code is available on GitHub.

See Also

Monday, July 27, 2020

Send emails from ASP.NET Core websites using SendGrid and Azure

Today we have multiple free options to send email from our apps. Let's review how to configure and use SendGrid and Azure to send emails from our ASP.NET Core apps and benefit from their extraordinary free plan.
Photo by Carol Jeng on Unsplash

Long are the days that we had to use Gmail App Passwords to send and test emails from our apps. Today we have a plethora of alternatives that cost nothing or close to nothing. On that category, SendGrid offers Azure subscribers 25,000 free emails per month! So let's review how to setup a free SendGrid account and build a simple ASP.NET website to send emails from it.

On this post we will:
  • create a SendGrid account directly in Azure
  • build a simple ASP.NET Core web app and review how to properly configure it
  • access and configure our SendGrid settings in SendGrid
  • send emails using SMTP (not the RESTful API) from our console application
For a quick start, download the code from GitHub at: github.com/hd9/aspnet-sendgrid

Creating a SendGrid account in Azure

The good news is that in case you don't have one already, you can create a SendGrid account directly from Azure. Let's get straight to it. Open your Azure portal and type sendgrid on the search tool bar and click on SendGrid Accounts:
Click Add to create our account from Azure:
Enter your information on the next screen:
Review and confirm your package:
Wait until your deployment completes (it should take no more than 10 seconds). Now go back to SendGrid Accounts and you should see your new account there:
Clicking on it would take you to the SendGrid pane showing you essential information about your new resource:
Did you notice that Manage button? Clicking that button will take us directly to SendGrid where we'll be able to configure out account, create api keys, monitor our usage and a lot more.

I won't expand much in what SendGrid offers (tldr; a lot!). For more of that, feel free to visit their website.

Configuring SendGrid

The first time you login to SendGrid, you'll be requested to confirm your email address. After confirmation, this is the what you should see a screen similar to the below, showing you a general overview of your account:

Creating our SMTP API Key

To be able to send emails from SendGrid, we'll have first to generate a password. First click on Settings -> API Keys:
Choose Restricted Access:

Select Mail Send (for this demo we only need that one):

And click create. You'll be presented with your password (api key). Copy it safely:

SendGrid Configuration

With the password in hand, here's a summary about the configuration we'll need:
  • Host: smtp.sendgrid.net
  • Port: 587
  • Username: apikey
  • Password: SG.zGNcZ-**********************

Building our App

I guess that at this point, creating an ASP.NET web app is no surprise to anyone. But if you're new to .NET Core, please check this documentation on how to build and run ASP.NET Core on Linux. It's a different perspective from the Visual Studio-centric approach you'll see elsewhere. To quickly create with VS, File -> Create a new project and select Web Application (Model-View-Controller).

Configuring our App

With the configuration in hand, let's now review how to use it. To simplify things, I built already a simple web app that captures 2 fields: name and email of a potential newsletter subscriber. It looks like this and is available on GitHub:
Apart from the visual, there are a couple of things on this app that are worth looking into. Let's start with the configuration. If you open appsettings.json on the root of the project you will see:
  "SmtpOptions": {
    "Host": "<smtp>",
    "Port": "587",
    "Username": "<account>",
    "Password": "<password>",
    "FromName": "<from-name>",
    "FromEmail": "<from-email>",
    "EmailOverride": "<email>"
  },
  "EmailTemplate": {
    "Subject": "[HildenCo WebStore] Welcome to our newsletter!",
    "Body": "Hello {0},\nThanks for signing up for our newsletter!\n\nBest Regards,\nHildenCo."
  }

Since I already explained how to bind that config to a class of our own, I'll not extend too much on the topic. Essentially we will:
  • map the SmtpOptions configuration into a SmtpOptions class
  • map the EmailTemplate config into the EmailConfig class
That mapping is done elegantly by the framework as this line from Startup.cs shows:
cfg = configuration.Get<AppConfig>();
Inspecting cfg during debug confirms the successful binding:

Dependency Injection

Next, it's time to setup dependency injection. For our objective here, ASP.NET's default DependencyInjection utility is good enough. Put the below in your ConfigureServices method to wire everything up:
services.AddSingleton(cfg.SmtpOptions);
services.AddSingleton(cfg.EmailTemplate);
services.AddTransient<IMailSender, MailSender>();
Next, inject the dependencies needed by our Controller and our MailSender classes:
readonly IMailSender _mailSender;
readonly ILogger<HomeController> _logger;

public HomeController(
    IMailSender mailSender,
    ILogger<HomeController> logger)
{
    _logger = logger;
    _mailSender = mailSender;
}

Invoking SendMail from our controller

To call MailSender from our controller, simply inject a SendMail command into and invoke it:
await _mailSender.Send(new SendMail
{
    Name = signup.Name,
    Email = signup.Email
});

Our MailSender class

To finish, here's an excerpt of our MailSender class (see the full source on GitHub):
// init our smtp client
var smtpClient = new SmtpClient
{
    Host = _smtpOptions.Host,
    Port = _smtpOptions.Port,
    EnableSsl = true,
    DeliveryMethod = SmtpDeliveryMethod.Network,
    UseDefaultCredentials = false,
    Credentials = new NetworkCredential(_smtpOptions.Username, _smtpOptions.Password)
};
// init our mail message
var mail = new MailMessage
{
    From = new MailAddress(_smtpOptions.FromEmail, _smtpOptions.FromName),
    Subject = _tpl.Subject,
    Body = string.Format(_tpl.Body, msg)
};
// send the message
await smtpClient.SendMailAsync(mail);

Testing the App

Run the app with Visual Studio 2019, enter a name and an email address. If all's configured correctly, you should soon get an email in your inbox:
As well as SendGrid reporting a successful delivery:

Final Thoughts

The only remaining question is why SMTP? The advantages of using SMTP instead of the API is that SMTP is a pretty standard protocol, works with .NET's primitives, works with any programming language or framework and, contrary to the restful API, does not require any specific packages. SMTP also works well with containers, but I'll leave that fore a future post. 😉

Conclusion

On this tutorial we reviewed how to create a SendGrid account directly from Azure, we demoed how to configure it so we can send emails from our applications. SendGrid is a great email service with a very powerful API that I recommend exploring and learning other topics such as creating your own templates, using webhooks, etc. On the future we'll revisit this example to send email from our own ASP.NET containers in a microservice application. Keep tuned!

Source Code

As always, the source is available on GitHub.

References

See Also

Wednesday, July 15, 2020

Hosting NuGet packages on GitHub

On this post let's review how to build, host and consume our own NuGet packages using GitHub Packages
Photo by Leone Venter on Unsplash

Long gone are the days we had to pay to host our NuGet packages. Today, things have changed. We have many options to host our own NuGet packages for free (including privately if we wish) including in our own GitHub repositories. On this tutorial let's review how to build our own packages using .NET Core's CLI, push them to GitHub and finally, how to consume from our own projects.

About NuGet

NuGet is a free and open-source package manager designed by Microsoft and used extensively in the .NET /.NET Core ecosystem. NuGet is the name of the tool and of the package itself. The most common repository for NuGet packages is NuGet.org hosting more than 200k packages! But we can host our own packages on different repos (including private ones) such as GitHub Packages. NuGet is bundled with Visual Studio and with the .NET Core SDK so you probably have it already available on your machine.

About GitHub Packages

GitHub Packages is GitHub's free offering for those wanting to host their own packages. GitHub Packages allows hosting public and private packages. The benefits of using GitHub Packages is that it's free, you can share your packages privately or with the rest of the world, integrate with GitHub APIs, GitHub Actions, webhooks and even create complex end-to-end DevOps workflows. For more information about GitHub Packages, click here.

Why build our own packages

But why build our own packages? Mainly because packages simplify using and distributing self-contained and reusable software (tools, libraries, etc) in a clean and organized way of doing so. Beyond that, other common reasons are:
  1. sharing packages with someone else (and possibly the world)
  2. sharing that package privately with your coworkers so they can be used in different projects.
  3. packaging software so it can be installed or deployed elsewhere.

Building NuGet Packages

So let's get started and build our first NuGet package. The project we'll build is a simple library consisting of POCOs I frequently use as standard onfiguration bindings when developing microservices: Smtp, Redis, RabbitMQ, MassTransit and MongoDB. I chose this example because this is the type of code we frequently duplicate, so why not isolate them in a shareable package and keep our codebase DRY?

Creating our project

To quickly create my project let's use the .NET Core CLI (feel free to use Visual Studio if you will):
dotnet new classlib -o HildenCo.Core
Then I'll add those config classes. For example the SmtpOptions looks like:
public class SmtpOptions
{
    public string Host { get; set; }
    public int  Port { get; set; }
    public string Username { get; set; }
    public string Password { get; set; }
    public string FromName { get; set; }
    public string FromEmail { get; set; }
}

Creating our first NuGet package

Let's then create our first package. The simplest way to do so is by configuring it via Visual Studio. For that, select the Project and Alt-Enter it (or right-click it with the mouse) to view Project Properties and check Generate NuGet package on build on the Package tab:
Don't forget to add relevant information about your package such as Id, Name, Version, Authors, Description, Copyright, License and RepositoryUrl. All that information is required by GitHub:
If you prefer, you can edit the above metadata directly in the csproj file.
Now, build again to confirm our package was built by inspecting the Build Output in VS (Ctrl-W, O):
1>------ Build started: Project: HildenCo.Core, Configuration: Debug Any CPU ------
1>HildenCo.Core -> C:\src\nuget-pkg-demo\src\HildenCo.Core\bin\Debug\netstandard2.0\HildenCo.Core.dll
1>Successfully created package 'C:\src\nuget-pkg-demo\src\HildenCo.Core\bin\Debug\HildenCo.Core.0.0.1.nupkg'.
========== Build: 1 succeeded, 0 failed, 0 up-to-date, 0 skipped ==========
Congrats! You now have built your first package!
Don't forget to add RepositoryUrl with your correct username/repo name. We'll need it to push to GitHub later.

Creating our package using the CLI

As always, the CLI may be a better alternative. Why? In summary because it allows automating package creation on continuous integration, integrating with APIs, webhooks and even creating end-to-end DevOps workflows. So, go ahead and uncheck that box and build it again with:
dotnet pack --configuration Release
This time, we should see this as output:
Microsoft (R) Build Engine version 16.6.0+5ff7b0c9e for .NET Core
Copyright (C) Microsoft Corporation. All rights reserved.

  Determining projects to restore...
  All projects are up-to-date for restore.
  HildenCo.Core -> C:\src\nuget-pkg-demo\src\HildenCo.Core\bin\Release\netstandard2.0\HildenCo.Core.dll
  Successfully created package 'C:\src\nuget-pkg-demo\src\HildenCo.Core\bin\Release\HildenCo.Core.0.0.1.nupkg'.
TIP: You may have realized that we now built our package as release. This is another immediate benefit from decoupling our builds from VS. On rare occasions should we push packages built as Debug.

Pushing packages to GitHub

With the basics behind, let's review how to push your own packages to GitHub.

Generating an API Key

In order to authenticate to GitHub Packages the first thing we'll need is an access token. Open your GitHub account, go to Settings -> Developer Settings -> Personal access tokens, click Generate new Token, give it a name, select write:packages and save:

Creating a nuget.config file

With the API key created, let's create our nuget.config file. This file should contain the authentication for the package to be pushed to the remote repo. A base config is listed below with the fields to be replaced in bold:
<?xml version="1.0" encoding="utf-8"?>
<configuration>
    <packageSources>
        <clear />
        <add key="github" value="https://nuget.pkg.github.com/<your-github-username>/index.json" />
    </packageSources>
    <packageSourceCredentials>
        <github>
            <add key="Username" value="<your-github-username>" />
            <add key="ClearTextPassword" value="<your-api-key>" />
        </github>
    </packageSourceCredentials>
</configuration>

Pushing a package to GitHub

With the correct configuration in place, we can push our package to GitHub with:
dotnet nuget push ./bin/Release/HildenCo.Core.0.0.1.nupkg --source "github"
This is what happened when I pushed mine:
dotnet nuget push ./bin/Release/HildenCo.Core.0.0.1.nupkg --source "github"
Pushing HildenCo.Core.0.0.1.nupkg to 'https://nuget.pkg.github.com/hd9'...
  PUT https://nuget.pkg.github.com/hd9/
  OK https://nuget.pkg.github.com/hd9/ 1927ms
Your package was pushed.
Didn't work? Check if you added RepositoryUrl to your project's metadata as nuget uses it  need it to push to GitHub.

Reviewing our Package on GitHub

If you managed to push your first package (yay!), go ahead and review it in GitHub on the Package tab of your repository. For example, mine's available at: github.com/hd9/nuget-pkg-demo/packages and looks like this:

Using our Package

To complete the demo let's create an ASP.NET project to use our own package:
dotnet new mvc -o TestNugetPkg
To add a reference to your package, we'll use our own nuget.config since it contains pointers to our own repo. If your project has a solution, copy the nuget.config to the solution folder. Else, leave it in the project's folder. Open your project with Visual Studio and open the Manage NuGet Packages. You should see your newly created package there:
Select it and install:
Review the logs to make sure no errors happened:
Restoring packages for C:\src\TestNugetPkg\TestNugetPkg.csproj...
  GET https://nuget.pkg.github.com/hd9/download/hildenco.core/index.json
  OK https://nuget.pkg.github.com/hd9/download/hildenco.core/index.json 864ms
  GET https://nuget.pkg.github.com/hd9/download/hildenco.core/0.0.1/hildenco.core.0.0.1.nupkg
  OK https://nuget.pkg.github.com/hd9/download/hildenco.core/0.0.1/hildenco.core.0.0.1.nupkg 517ms
Installing HildenCo.Core 0.0.1.
Installing NuGet package HildenCo.Core 0.0.1.
Committing restore...
Writing assets file to disk. Path: C:\src\TestNugetPkg\obj\project.assets.json
Successfully installed 'HildenCo.Core 0.0.1' to TestNugetPkg
Executing nuget actions took 960 ms
Time Elapsed: 00:00:02.6332352
========== Finished ==========

Time Elapsed: 00:00:00.0141177
========== Finished ==========
And finally we can use it from our second project and harvest the benefits of clean code and code reuse:

Final Thoughts

On this post we reviewed how to build our own NuGet packages using .NET Core's CLI, pushed them to GitHub and finally described how to consume them from our own .NET projects. Creating and hosting our own NuGet packages is important for multiple reasons including sharing code between projects and creating deployable artifacts.

Source Code

As always, the source code for this post is available on GitHub.

See Also

Monday, January 6, 2020

Countdown to .NET 5

2020 is an excellent year for .NET. This is the year we'll finally see .NET 5 merging .NET Core, .NET Framework and Xamarin.
2020 brings great news for .NET developers. This is the year that, Microsoft expects to consolidate .NET Core and .NET Framework on a single platform called .NET 5 including .NET mobile (Xamarin), ASP.NET Core, Entity Framework Core, WinForms, WPF and ML.NET.. The first preview is expected in the first half of the year with the official release foretasted for Nov, 2020. Excited? You should be!

Update: The first beta release is available now!

Great news for .NET developers

That's great news for folks working on .NET Core since there'll be an influx of projects to work, contribute and develop. But that's even better news for teams working on slow-moving projects (aka, most of us) which have been deferring an update to the more modern, faster and container-friendly .NET Core.

I posted some time ago my insights regarding this update. TLDR, I'm super excited! Being a long time Fedora Linux user and a big open source enthusiast, I have been using .NET Core for my personal projects on Linux (and running them successfully on both Docker, AWS and Azure). While I'm transitioning more and more my workflow to open source software (such as Vim, i3, etc) and and have been working a decent portion of my time with Go and Python, .NET is still my default framework.

So let's take another look at what's coming up next with .NET.

Highlights of .NET 5

Apart from the single codebase, my preferred highlights of .NET 5 are:
  • .NET will become a single platform including Xamarin, ASP.NET Core, Entity Framework Core, WinForms, WPF and ML.NET
  • Unified .NET SDK experience:
    • Single BCL (Base Class Library) across all .NET 5 applications. Today Xamarin applications use the Mono BCL but will move to use the.NET Core BCL, improving compatibility across our application models.
    • Mobile development (Xamarin) is integrated into .NET 5. This means the .NET SDK will support mobile. For example, you can use “dotnet new XamarinForms” to create a mobile application.
  • Native Applications supporting multiple platforms: Single Device project that supports an application that can work across multiple devices for example Window Desktop, Microsoft Duo (Android), and iOS using the native controls supported on those platforms.
  • Cloud Native Applications: High performance, single file (.exe) <50MB microservices and support for building multiple project (API, web front ends, containers) both locally and in the cloud.
  • Open source and hosted on GitHub
  • Cross-platform and better performance
  • Decent command-line interface (CLI)
  • Java, Objective-C and Swift interoperability
  • Support of static compilation of .NET (ahead-of-time – AOT)
  • Smaller footprints

A Unified Platform

This is a more holistic view of what .NET 5 will be:

The Schedule

The proposed merge is expected to happen by November 2020. Here's the plan:
You can also check the release status in real time on GitHub (Jan, 2020):

What's Next

So what's next? Well, the best thing to do is to keep an eye on .NET's official blog as they'll be updating the status of the project through there. Would you like to contribute? Jump into .NET Core and CoreFx repositories in GitHub. For more information on the topic, consider reading .NET Core and .NET merging as .NET 5.0.

References

See Also

For more posts on .NET Core, please click here.

Tuesday, November 6, 2018

Why use Fedora

Ubuntu may be the most popular Linux distribution however Fedora may be a better alternative for your desktop. Read to understand.
Photo by Clem Onojeghuo on Unsplash

Fedora Linux is a fantastic operating system. On this post I'd like to explore the reasons why I use and recommend Fedora as my daily driver, and present you with some of the reasons why I think it could be your next (and last) Linux distribution.

It's 2023 and there are endless praises to Fedora in YouTube. TL;DR: Since this post was written (7 years ago), Fedora became the most recommended Linux distro for users that want the best Linux experience. Hope you enjoy the article!

My personal journey

Everyone has their own Linux journey. In the beginning it's common for people to try out many distributions until they settle down to one they're comfortable with. In the end, it's all about trade offs. So let let me tell you mine and how I got to choosing Fedora as my main Linux Distribution.

I always used Linux... in dual-boot mode. My journey with it started two decades ago when I was introduced to Slackware Linux. What I loved in Slackware was the level of granularity in which I could tweak my system. But soon I realized that Slackware required a lot of hands on and quickly moved to Red Hat Linux (before RHEL) which provided a more streamlined experience with its package-based system based on yum/RPMs.

Since then I've tried (in that order): Mandriva, Fedora Core, OpenSuse and more recently Ubuntu, Mint, elementary OS, Xubuntu, Lubuntu, Arch, Manjaro and SOLUS. Yes, call me a distrohopper. Then I decided to retry Fedora 24 and check how it had progressed. Eight years later, Fedora remains my primary desktop.

With all that said, let me describe some of the reasons I think you should consider using Fedora on your desktop.

Why I chose Fedora

So let's explore some honest reasons to use Fedora.

Simplicity

Simplicity definitely comes first. Simplicity is one of the characteristics that I enjoy the most in Fedora and is the reason I often recommend it to new users. From the installation to the default UI, everything seems integrated, accessible, fast and intuitive to use. Plus, the default GNOME desktop is pretty solid, its animations are smooth and the performance is really good.

A Fedora workstation running Gnome 3.30 / Source

Stability

Fedora is very stable. And differently from what people think, Fedora is not a beta-testing environment for RHEL. Packages are tested on its development channel, validated and once stable with all dependencies met, released to millions of users. Be sure that for each update that you get, hundreds of hours of tests were performed.

Security

Fedora shines on the security aspect. We know that online security is way more than keeping the system up to date is as important as having a good anti-virus software, a working firewall and safe web browsing habits. Fedora counts with a robust SELinux integration and given its First Principle, Fedora users frequent more up to date software and kernel updates than all other non-rolling release distros.
For those who don't know, SELinux was developed by the NSA and is the standard access control tool for critical services blocking suspicious behavior by default.

Privacy

Linux users shouldn't be concerned about privacy. Or should we?  Fedora discloses its Privacy Policy publicly and adheres to it as to its core principles: Freedom, Friends, Features and First. Differently from other distributions, Fedora never sent your desktop search results to e-commerce sites, or contains intrusive telemetry that cannot be turned off.

Development-Friendly

Developers are pretty much covered with everything on the development site. You will find  Go, Rust Docker, Swift, Python, NodeJs, Ruby, Java,  among others can be found in the repos. Anything else? You will find it there.

Performance

Fedora performs. My 5 yr-old laptop boots in less than 10 seconds. The performance is mainly due to more up to date software and to keeping the OS running only with the necessary resources. Yes there are faster options and yes, Gnome is not as light as other window managers (but got really better as of Gnome 3.36) but it's still the best choice for the average user.

Freedom

With Fedora, free alternatives are chosen to proprietary code and content and limit the effects of proprietary or patent encumbered code on the Project. Releases that are predictable and include only 100% free software.

Community-Driven

Differently from other distros which are subject to private interests, Fedora is driven by a community of dedicated and passionate enthusiasts.  All communication is open to the public and everyone is invited to collaborate! The Fedora communities on the internet are pretty receptive and you'll always find someone willing to help you.

Reliability

The Fedora project serves as the base for RHEL and CentOS. So it needs to be mature, it needs to be stable. It's a very serious Linux desktop operating system used daily by millions of users and servers around the world. It needs to be reliable. Personally, I had zero problems in my last 5 years doing distribution upgrades.

Cutting-Edge Software

Fedora is frequently mentioned as the distribution that explores the outer limits of what Linux can do. But that's no news to Fedora users since is the First foundation adopted by the project. Fedora repos usually land features way earlier than Ubuntu and derivatives (Elementary, Mint and Pop!_OS) which IMHO is as best as it can be without being a rolling release. And remember, you can always add different repos or install software trough universal Linux packages like Flatpak.

Frequent Updates

Fedora updates are frequent. Sometimes, multiple times a week I get software upgrades covering security issues, performance, stability and even Kernel updates. It's also common to get multiple kernel updates per release. That usually means running a more mature, stable and secure kernel. It also means better performance and supported hardware too.

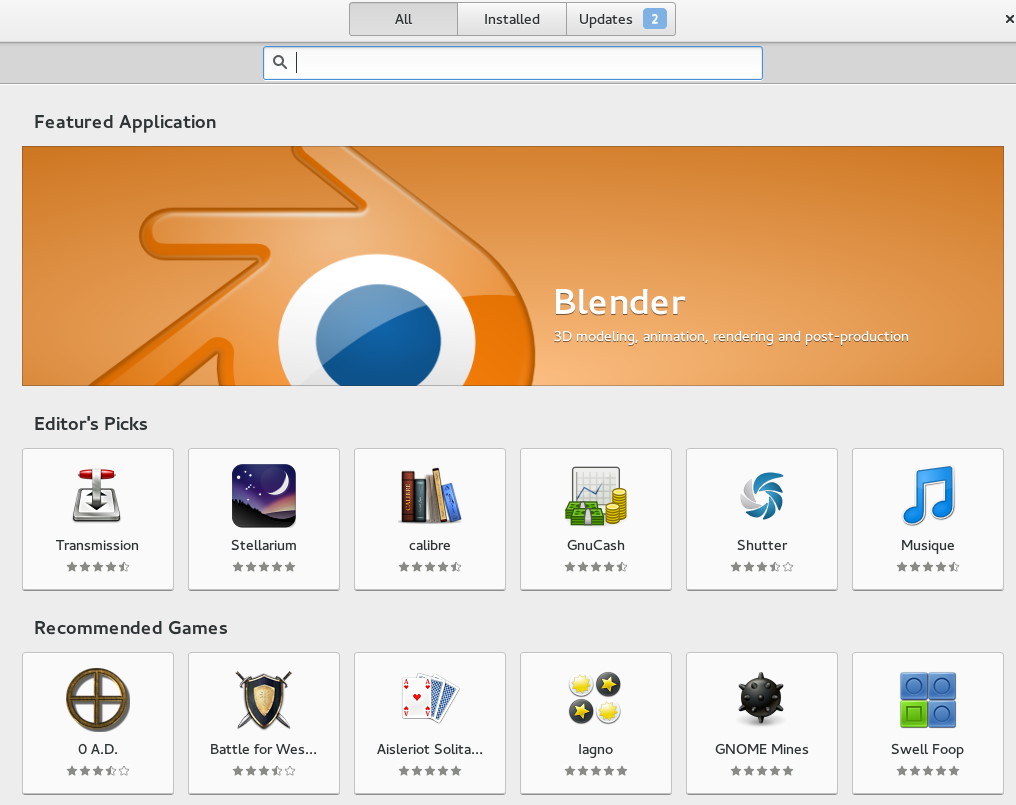
Impressive Software Selection

The default package repository contains all the software you will ever need. Plus, in Fedora the software can be managed by the powerful DNF package manager. For example, this is the number of packages (software) available from the repository ran from my XFCE instance:
DNF also handles distribution updates which happen twice a year.

Custom Software Repositories

The amount of software available on the official Fedora repo is incredible. Probably everything that you need, you can find there. But if you're not covered for the package selection on the free/default repo, you still could make use of RPM Fusion to install software that doesn't adhere to Fedora's requirements.

Not to mention Copr (Cool Other Package Repo), a Fedora project to help  building and managing third party package repositories easy. Copr is hosted under the Fedora Infrastructure and allows developers to create repos so they can be shared with users.

Excellent Hardware Support

Fedora has excellent support for hardware. I don't have cutting-edge hardware neither am a gamer so I cannot comment on that but for most people, both the Fedora installer and the kernel are very good at recognizing and activating the hardware. That's probably a good reason why most people stop distrohopping when they get to Fedora. Most of the issues (including lack of hardware support) disappear.

Incubator for new features

The Fedora community creates many of the technical features that have made Linux powerful, flexible, and usable for a wide spectrum of millions of users, administrators, and developers worldwide. In fact, this is the Missions and Foundations of the project:
The Fedora community prefers approaches that benefit the progress of free software in the future over those that emphasize short term ease of use.
Some of the features developed with Fedora include:
  • The Linux Kernel - there are hundreds of kernel hackers worldwide using Fedora. The most famous of them is Linus Torwalds, the creator of Linux ("It just works").
  • Wayland - a new display system replacing the venerable X.org.
  • XWayland - extensions to the X server so it can be run as a Wayland protocol.
  • systemd - Linux's default init system and used on 95% of the modern and most popular distros.
  • GNOME - a free and open-source desktop environment for Unix-like operating systems. 
  • The GTK toolkit - a cross-platform widget toolkit for creating graphical user interfaces.
  • PipeWire - a new audio and video subsystem
  • Flatpak - application packaging
  • The cockpit project - Manager your server in a web browser and perform system tasks with a mouse.
  • Anaconda installer - Anaconda is a free and open-source system installer for Linux distributions used in Fedora, RHEL, CentOS and other Linux distributions. 
  • Podman - a tool to create and maintain containers.
    Buildah - a tool to create and manage container images
  • Silverblue - a next-gen OS for the desktop 
  • Fedora CoreOS - a next-gen cloud appliance. 
  • Modularity - Modularity is a mechanism of making multiple versions of software available to your system.

Two upgrades per year

Because Fedora releases happen twice a year, you'll get big system updates (including Gnome, GCC and base libs) twice a year. It's the best way to have up to date software without the complexities and issues rolling release distros have. Upgrading is as simple as 2 clicks on the Software app or running the below on your terminal:
sudo dnf upgrade --refresh
sudo dnf install dnf-plugin-system-upgrade
sudo dnf system-upgrade download --releasever=XXX
sudo dnf system-upgrade reboot

Universal Linux Packages

You know you can install software using the package repos. Another option is using Snap or FlatPak. And installation is as simple as opening Software -> Searching and clicking install.

RHEL

Many people ignore this but another strong reason to use Fedora is because it's RHEL's upstream. You'll be using with Yum/DNF, SystemD, SELinux, and testing what will be available on the next RHEL, the leading Linux-based OS on servers. Invaluable knowledge to have.

Variants 

Don't like GNOME? Fedora also ships different spins including KDE, Xfce, LXQt, MATE, Cinnamon, LXDE and others. All available in both 64-bit and 32-bit versions. It has even support for ARM and IoT.

Fedora in some of its variants
You can also find on Labs, variants that are target to designers, astronomers, scientists and musicians.

A multitude of options for your desktop

Don't like the default? You can always change. For example, check this post to learn more about a multitude of desktops and window managers available on Fedora 31. Among my favorites:
  • i3 (and its Wayland alternative Sway) - my personal choice ❤!
  • XFCE - also use on my cloud instances, including on my Ubuntu instance on azure
  • KDE - an excellent desktop for your Linux PC
  • GNOME - I also have it installed at home as a fallback in case my i3 breaks (never happened 😊)
  • And another multitude of options - counting at 38 alternatives to customize your desktop
Still on tiling window managers, for a couple of years now I'm using the i3 window manager (shown on the screenshot below) and I love it! For more information check my post on why i3 is awesome, how to install it and why it will change the way you use your Linux desktop.
Source: DevianArt

So, Fedora is perfect?

Of course not! No software is perfect as no software will ever be bug-free. However, it's important to consider that open-source operating systems are extremely complex software bundles composed of thousands of packages developed by volunteers worldwide.

Fedora provides the best balance in what matters most: open-source software, up-to-date software and a strong focus on stability, security and privacy. Plus, you can find on Fedora and its derivatives everything you're looking for. Need a more stable environment for your server or container? Go with Fedora Server or CentOS. Want to go even more cutting edge on the desktop? Try Silverblue. Need a lightweight alternative for that old netbook? Go with Fedora XFCE. Using ARM on a Pi or on a Pinebook Pro? Try Fedora ARM!

Fedora also shines on its community aspect. The community is very open for onboarding newcomers and volunteers. And as previously mentioned, everyone is invited to collaborate, even if it's just to write articles for the Fedora Magazine. All communication is shared online and the teams are structured to help newcomers trough mentoring programs.

Conclusion

Fedora is a polished, modern, stable, secure and privacy-focused GNU/Linux operating system. With all its variants, I'm pretty sure there will be something for you too! If you have never used it, I would suggest that you try it, regardless of your technical background. If you use another distro, I would kindly recommend that you to download Fedora, install it on a VM and give it a try. And don't hesitate to send a big thank you to the @Fedora community on Twitter.

References

See Also

About the Author

Bruno Hildenbrand      
Principal Architect, HildenCo Solutions.